Part 3 - Preparing to Add Features
This part of the tutorial explores preparing a simple blog using the Jekyll Poole (poole 2018)1 theme.
The basic_blog website from part 2 of the tutorial provides several useful blog features (e.g., page-navigation) as part of the Minima theme (default for Jekyll 3). Implementing these features requires an understanding of Jekyll website structure and associated technologies (e.g., Liquid). It is useful to learn these concepts since they can be applied to create new features that may not be provided by a chosen theme.
Therefore, to provide an opportunity to explore these concepts, useful blog features (e.g., page-navigation) will be added to a simple existing theme hence facilitating familiarity with these concepts.
Jekyll Themes
Jekyll themes offer a Jekyll website structure containing necessary components including reusable layouts and styles, enabling consistent design and potentially useful features.
Due to the popularity of Jekyll, a wide variety of themes (free and premium) are available via several theme-distribution websites, e.g.:
The following parts of the tutorial will focus on augmenting the popular simple Poole theme, which emphasises a content-first approach, leaving feature augmentation to webmasters. Two other popular themes (Hyde (fixed sidebar) and Lanyon) based on Poole provide additional functionality (e.g., Hyde provides fixed sidebar navigation, and Lanyon provides a togglable sidebar drawer), Poole enables the tutorial to explore adding custom functionality to facilitate learning of Jekyll concepts.
Obtaining the Poole Theme
The Poole theme can be downloaded as a .zip file from here via the Clone or download > Download ZIP buttons.
The .zip file can be extracted via the extract tool in Windows File Explorer or alternative extraction tools such as 7-Zip. The contents of the resulting poole-master directory should be:
$ ls
_config.yml  _layouts/  _sass/    about.md  index.html  public/    styles.scss
_includes/   _posts/    404.html  atom.xml  LICENSE.md  README.md
Locally building and serving the poole-master website can be done via:
$ git --version
git version 2.16.2.windows.1
The generated poole-master website can via viewed by entering its server address in a web-browser (usually localhost:4000) or equivalently via command line prompt:
start http://localhost:4000
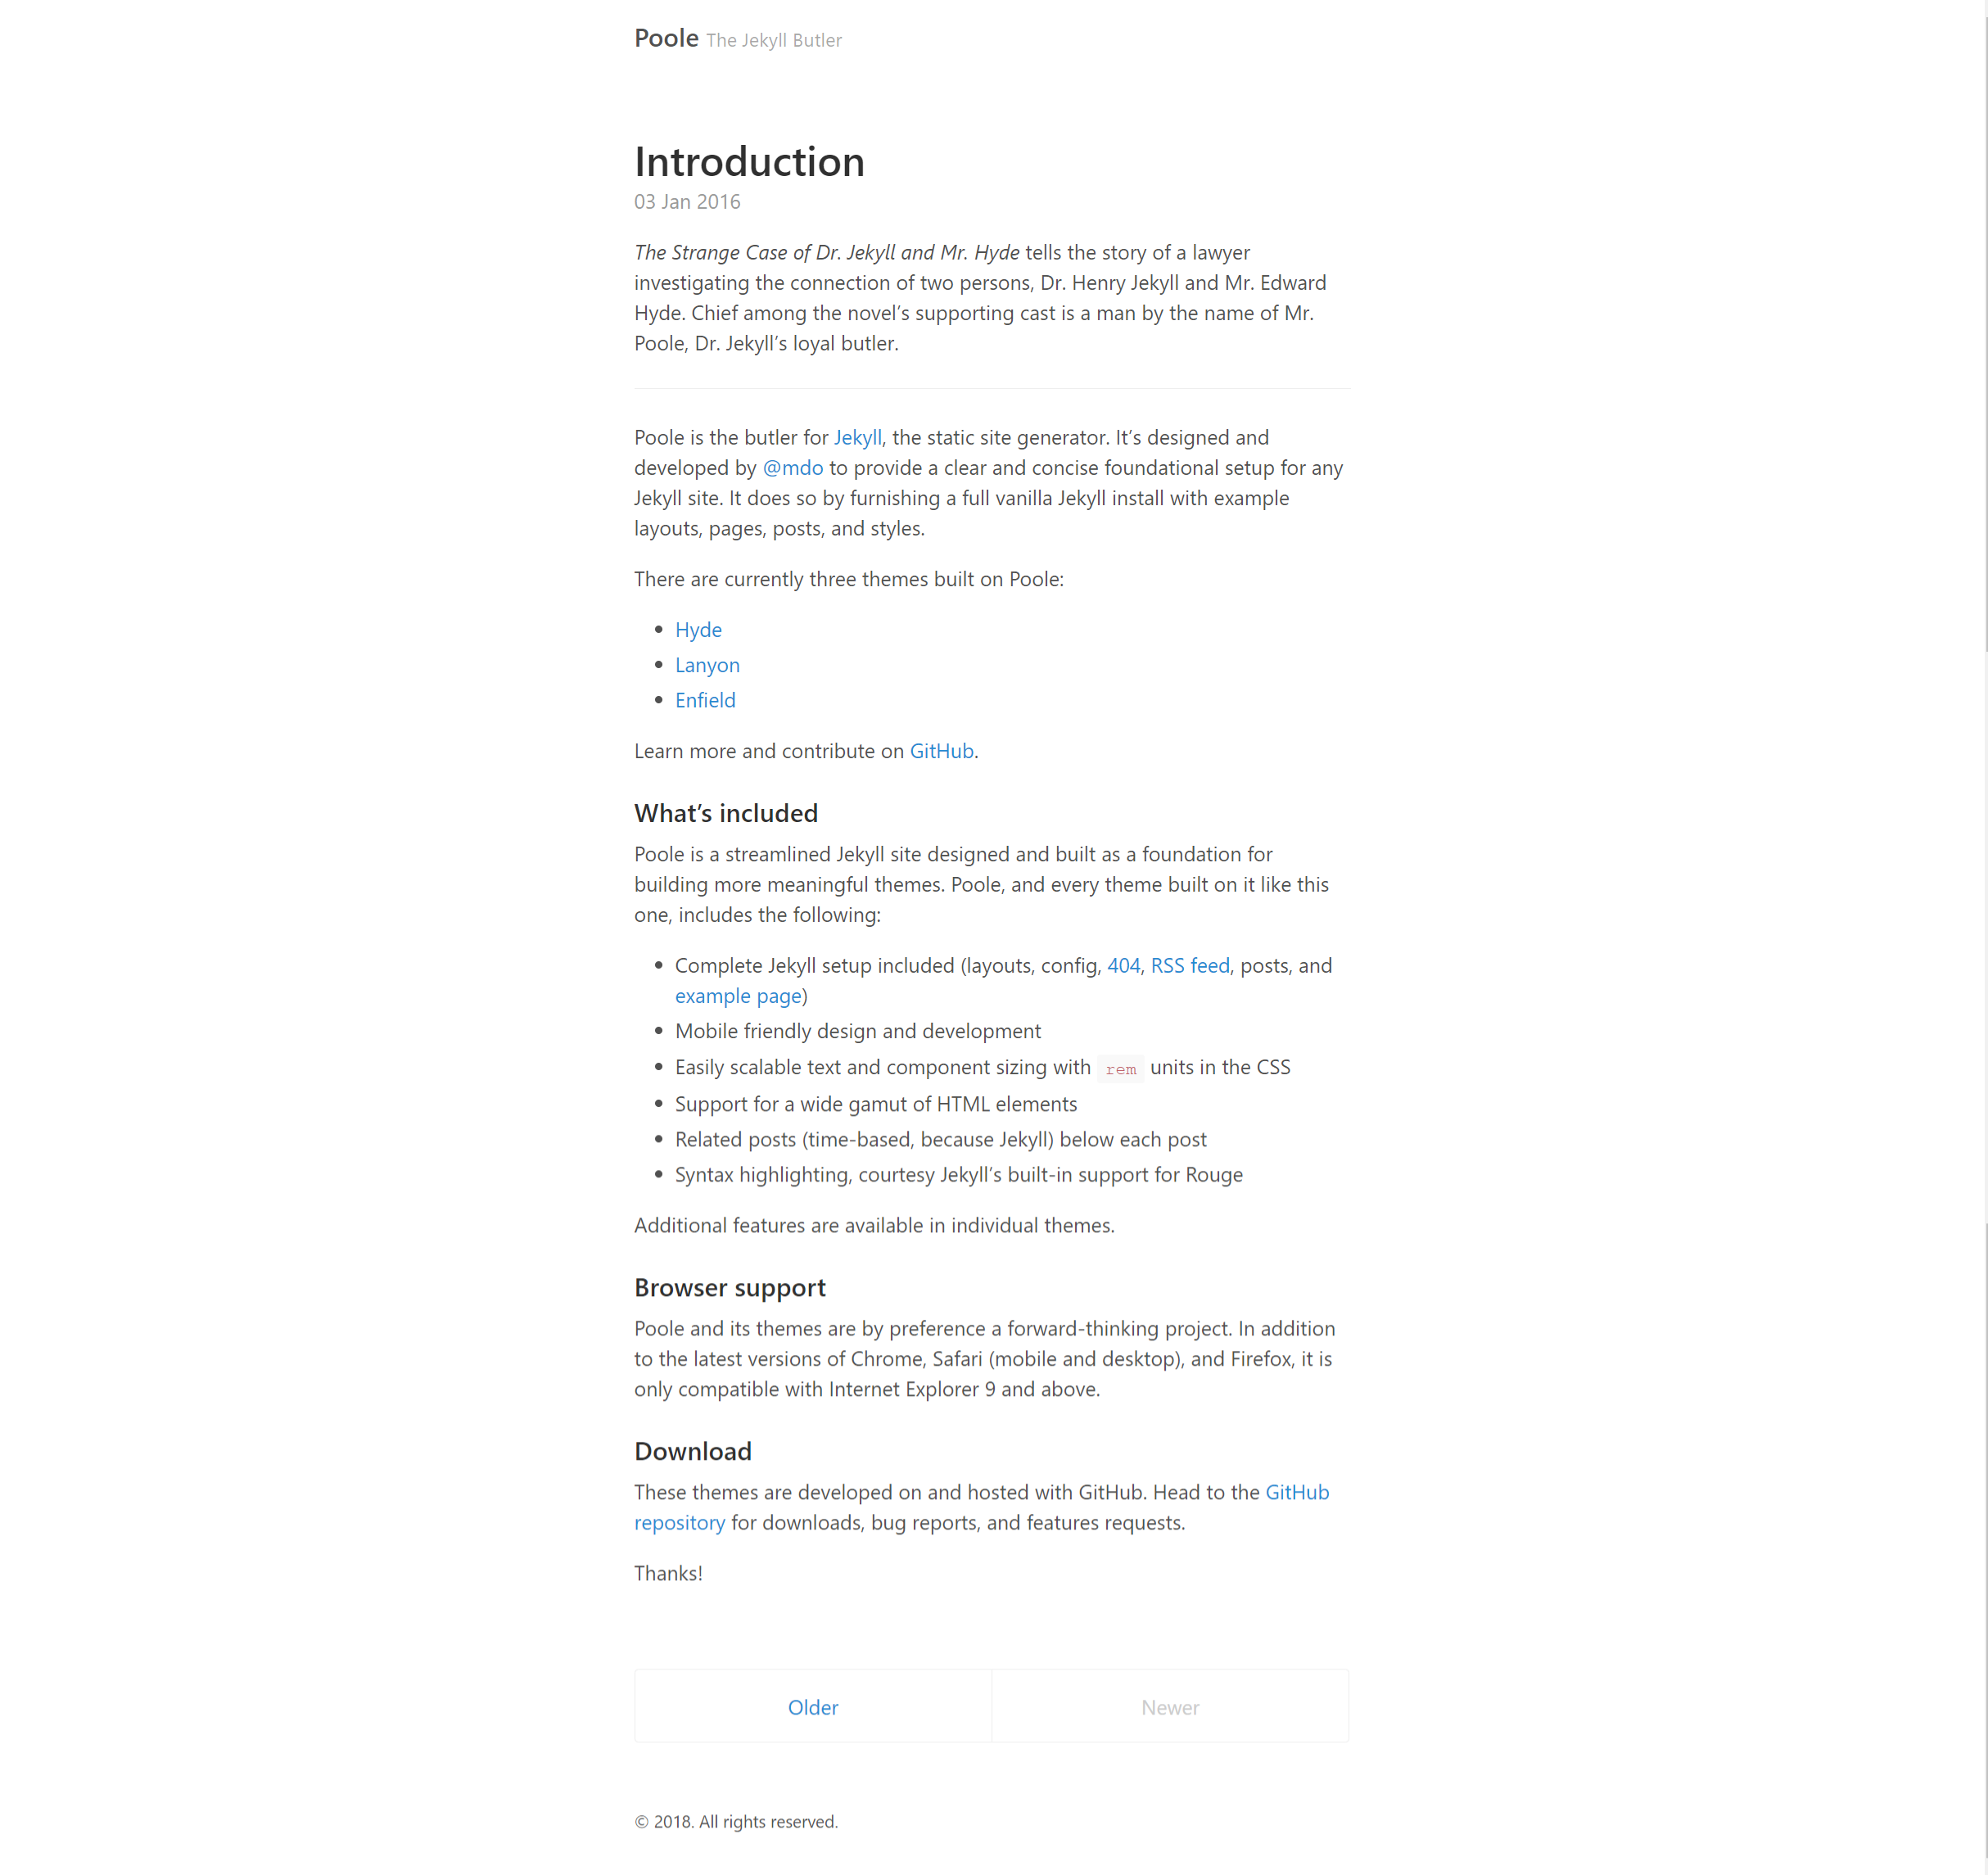
The poole-master website should display a simple webpage with blog title header, latest post paginated via post-navigation buttons, and a footer:
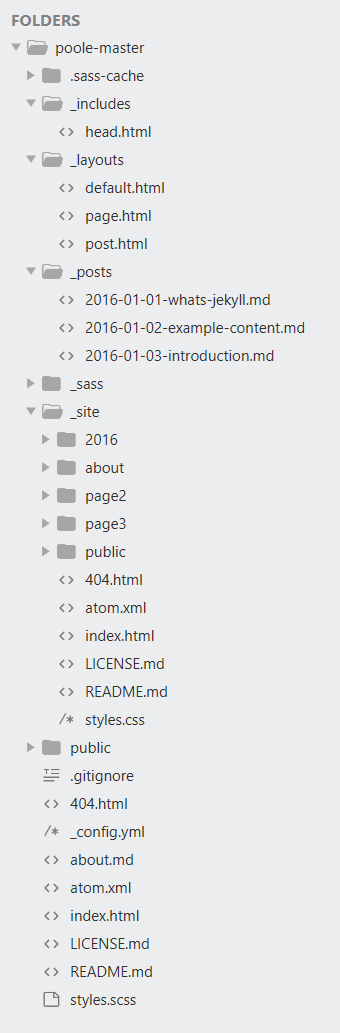
Understanding the poole-master Website Structure
The poole-master website structure contains several directories and files, however, some are familiar from part 2 of this tutorial (e.g., _posts).
The structure shows there are 3 posts (in _posts), 3 layouts (in _layout), 1 reusable header component (in _includes) among several other components. The generated site structure is visible in _site.
Tracking Changes via Git
It is useful and good practice to track project changes via version control systems such as Git.
A snapshot of the current state of the poole-master website files can be recorded via a Git repository.
Create a local Git repository within the poole-master directory:
$ git init
Stage (i.e., mark as ready to commit) all files within the poole-master directory (. adds all files within the current directory):
$ git add .
Commit (save changes of) the staged files, and provide a message detailing why the changes were made:
$ git commit -m "message"
Sending Changes to GitHub
GitHub provides cloud storage of projects and several version control features (e.g., issue-tracking) including GitHub Pages, which enables free building and hosting of statically generated Jekyll websites.
Create an account at GitHub, and new repository named poole-master. The newly created repository (at https://github.com/username/poole-master) should provide its URL via its Clone or download button.
The following instructions are based (GitHub 2018)2
Link the local repository to the remote GitHub poole-master repository using its URL:
$ git remote add origin remote URL
Send local commits to the remote GitHub poole-master repository:
$ git push origin master
Setup automatic Jekyll build via GitHub Pages
In the poole-master Github repository settings (i.e., https://github.com/username/poole-master/settings), enable GitHub Pages by selecting master branch as the Source. This will able GitHub Pages to build and host the poole-master website (at https://username.github.io/poole-master).
Through research and testing, it was discovered that the contents of the poole-master GitHub repository must be the same as the root contents of the local poole-master directory (i.e., avoid nesting of the poole-master website structure).
Further research highlighted the importance of the url (i.e., host, e.g., username.github.io) and baseurl (i.e., path of the website, e.g., /poole-master) which are used to generate absolute links in the final static website. These must be configured in _config.yml, however, this may break when locally serving the website during testing hence these fields can be temporarily commented out during testing.
With GitHub Pages setup, its hosted poole-master website will automatically rebuild and update the website when changes are pushed via Git to the remote GitHub repository. Hence publishing posts only requires adding a post and pushing its changes to the GitHub repository.
The alternative to using GitHub Pages would be locally building the website via jekyll build, and transferring the generated _site static website directory to a desired deployment server. This approach provides the flexibility of using a custom server and eliminating dependency on GitHub Pages. However, the convenience of automatic builds on pushing changes to GitHub is lost, hence the _site directory will need to be manually built and used to update the server.
For example this tutorial site is hosted via GitHub pages (accessible here) where adding a new post requires pushing changes, which results in an automatic build and updated website. The tutorial page will also hosted on a university web-server (accessible here) where adding a post requires manually rebuilding the website and transferring the generated static website (i.e., _site) to the web-server.
References
-
poole (2018). The Jekyll Butler. [online] Available at:https://github.com/poole/poole [Accessed 31st Dec. 2018]. ↩
-
GitHub Inc (2018). Adding an existing project to GitHub using the command line- User Documentation. [online] Available at:https://help.github.com/articles/adding-an-existing-project-to-github-using-the-command-line/ [Accessed 1st Jan. 2019]. ↩